| CHAPTER 1 XMP HARDWARE OVERVIEW | ||||||||||||
XMP Controller InstallationDepending upon form factor, installation of your XMP controller will vary. However, in all cases, good electrical contact must be ensured at connectors; otherwise, noise and power problems will develop. (Connections should be verified through inspection and testing.) Standard safety rules prevail during installation of any hardware. Some are summarized below for the XMP. For more information, refer to local occupational safety regulations and the manufacturer of your motion drive. Turn Off All Power Before Installing EquipmentBefore installing any motion control equipment, including XMP controllers, power should be switched OFF. Unplug all power plugs from their sources of power. 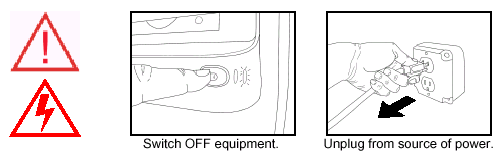
Observe ESD PrecautionsTo prevent damage to controller and drive electronics due to electrostatic discharge (ESD), service personnel are cautioned to observe proper grounding during handling of components. 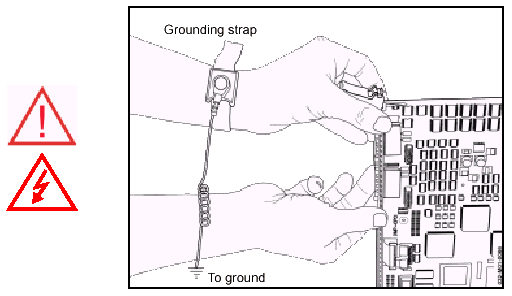
Grounding straps should be worn at all times when handling XMP controller boards and connection hardware. Define and Clear a Safety Zone!During installation and testing of motion control hardware-software, a safety zone should be defined around moving components and kept clear of personnel, hands, fingers, and loose hardware. During repowering of the system, motion control components may behave erratically due to misconnected lines, or wrongly configured software settings. Sudden and unexpected moves by components can cause injury, property damage or even death! Under NO circumstances, should a motion system be tested or operated while personnel are within the safety zone. Additionally, beware of flying debris from unsecured hardware operating at high speeds. The use of safety shielding is highly recommended. 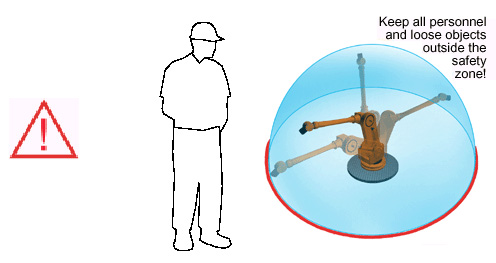
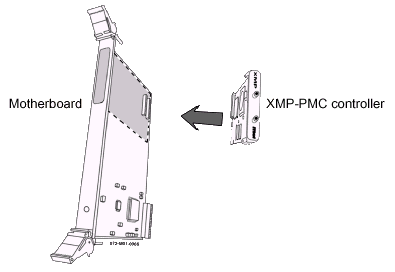
Install ControllerXMP controllers are designed to fit standard industry buses and card cages (e.g., PCI, CPCI). When installing and removing controllers, verify that good electrical contact is made between the controller and receptacle. PCIXMP-PCI controllers are installed into the PCI buses of their host computer's mother boards. During installation, verify the controller is seated firmly in its assigned PCI slot by firmly pressing downward. The I/O bracket should be screwed securely to the expansion bay chassis. 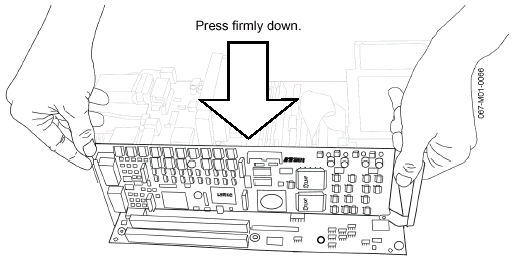
XMP-CPCI-6U and XMP-SERCOS-CPCI-6UXMP-CPCI-6U controllers are installed in industry standard CPCI slots. They are secured with ejectors. To install, first verify that both ejectors are in the open (rotated outward) position. Align the PC board with the card slot in the CPCI chassis, then press home. To secure, rotate each ejector until claws engage holes in the top-bottom chassis rails and lock the controller into place. To remove an XMP-CPCI-6U controller from its slot, first loosen the captive screws located at the top and bottom chassis rails. Next, simultaneously pinch each ejector at its flex point to unlock, then rotate outward. The controller should eject. 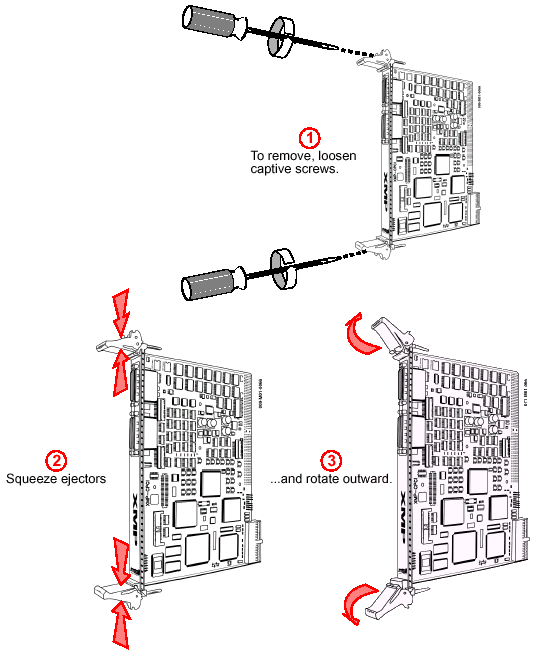
XMP-CPCI-3UXMP-CPCI-3U controllers feature one locking ejector at the base of the front panel and a captive screw at the top. The XMP-CPCI-3U chassis has an ejector rail along its bottom and a threaded hole on its top rail to match the captive screw. To install, first verify that the bottom ejector is in the open (rotated outward) position. Align the PC board with the card slot in the CPCI chassis, then press home. To secure, apply gentle pressure to the edge of the card while rotating the bottom ejector inward. The ejector's claws will engage holes in the bottom chassis rail and lock the controller into place. Secure the captive screw in the chassis at the top of the controller by rotating clockwise. To remove an XMP-CPCI-3U controller from its slot, first loosen the captive screw by rotating counterclockwise. Pull the red ejector tab outward, then rotate the ejector downward. The controller should eject. 
| |||||||||||||