CONTENTS:
Introduction
PCI
CPCI-6U
CPCI-6U Expansion Board, Backplane Connectors
CPCI-3U
SERCOS_PMC
Transceiver (XCVR) and I/O Details
CHAPTER 4
XMP-analog I/O

Introduction

This chapter describes analog I/O pin-outs for the XMP-PCI, XMP-CPCI-6U, and XMP-CPCI-3U controllers. The first section of this chapter describes connector hardware. The second section of this chapter describes the actual I/O configuration, including pin-outs, organized by form factor.

SERCOS I/O is described in Chapter 5 of this manual.

Identifying Analog I/O Hardware

Your analog XMP controller's I/O hardware type can be easily identified by examining the connection between the XMP controller and drive:
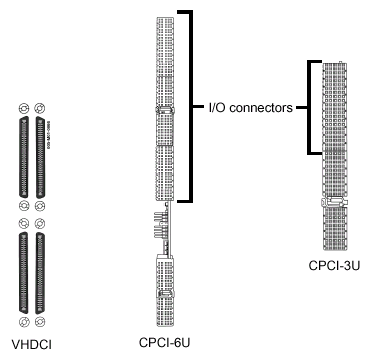
VHDCI Cabling and Terminal Block

XMP-PCI and XMP-CPCI use the same 68-pin cable for all front panel (VHDCI) I/O connections.
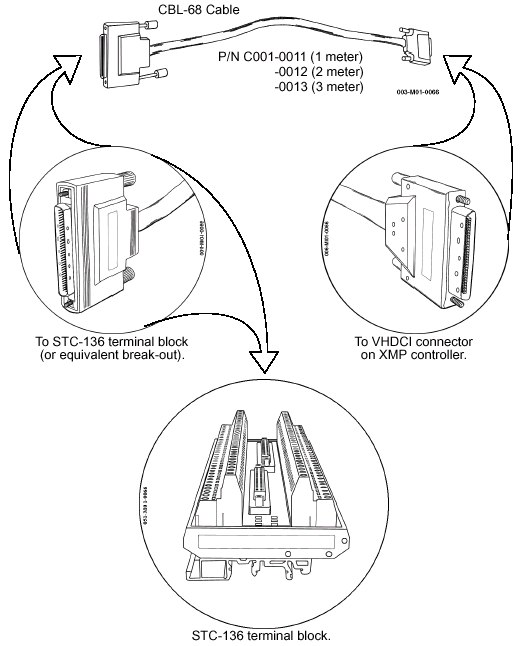
STC-136 Terminal Connector Blocks

All VHDCI connectors used with XMP controllers are 68-pin types. Corresponding to this, terminal blocks having 68 terminals per side are preferred. MEI recommends the STC-136, which can accommodate up to two cables. These use screw terminals for analog wiring.

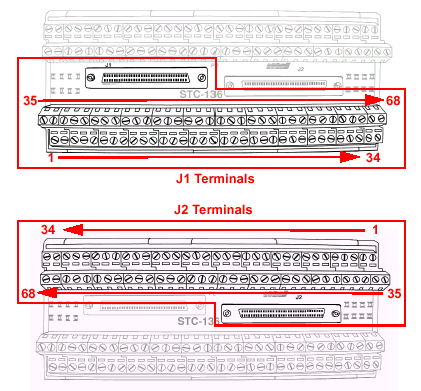
WARNING! Many "controller problems" can be traced to faulty wiring. As with all analog wiring, it is the user's responsibility to verify that wiring is correctly connected per specifications BEFORE applying power. Verify the following when wiring terminal blocks:

At the Terminal Block
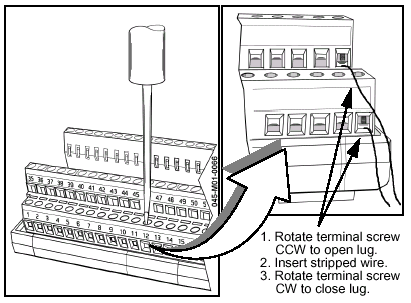
  • Verify all wiring is clearly and correctly labeled and color-coded for easy identification. Assembly personnel should have clear and concise wiring diagrams available when wiring.
  • Connect wires to terminal blocks by referencing terminal numbers, NOT by a wire's placement relative to another wire.
  • Strip wires appropriately: removing too much insulation will leave bare wires exposed and susceptible to short-circuits; removing too little insulation will prevent electrical contact inside the lug. Do not pinch or crimp wires when stripping--they will break!
  • Do not insert wire above a terminal block's lug. When the lug is tightened, it will not close on the wire, failing to make contact. Verify that debris does not enter the lug with the bare wire; it may prevent complete closure of the lug.
  • Verify that lugs are tight. Remove all loose wire strands.
  • Discard all terminal blocks with damaged traces.
At the Connectors
  • Verify that connector pins are straight BEFORE attempting to connect cables. Bent pins can short-circuit, or ruin a connector! If connectors resist, do not force them. Check for problems first.
  • Observe electrostatic discharge (ESD) precautions while handling connectors and terminal blocks. High-level ESD can damage circuitry over cables.