Toolbar
Functions
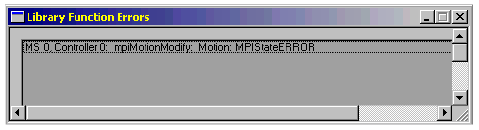
 View Error List-- MPI library function errors are displayed
in the Library Function Errors window. When there are no errors
to display, the View Error List button is disabled. Otherwise,
it is enabled and clicking on it opens the Library Function
Errors window.
View Error List-- MPI library function errors are displayed
in the Library Function Errors window. When there are no errors
to display, the View Error List button is disabled. Otherwise,
it is enabled and clicking on it opens the Library Function
Errors window.
To
empty the list, click on the Reset button. To close the list,
click on either the Close button, or the close ("X")
icon in the upper-right corner of the window. Some MPI error
messages are described in the Software Reference.
 New-- Clicking on the New Profile button will
create a new initialization file (.INI), or profile. The default
setting will initially display only the Object Explorer box
with no controllers. See the Profile Files section for more
information.
New-- Clicking on the New Profile button will
create a new initialization file (.INI), or profile. The default
setting will initially display only the Object Explorer box
with no controllers. See the Profile Files section for more
information.
 Open-- Clicking the Open Existing Profile button
will open a specified .INI file. See the Profile Files section
for more information.
Open-- Clicking the Open Existing Profile button
will open a specified .INI file. See the Profile Files section
for more information.
 Save As-- Clicking the Save Profile As button
will save the current profile into the specified .INI file.
See the Profile Files section for more information.
Save As-- Clicking the Save Profile As button
will save the current profile into the specified .INI file.
See the Profile Files section for more information.
 View Object Explorer-- Clicking on the View Object
Explorer button displays the Object Explorer window.
See "Object Explorer" section below in this chapter
for more information.
View Object Explorer-- Clicking on the View Object
Explorer button displays the Object Explorer window.
See "Object Explorer" section below in this chapter
for more information.
 Open and Configure Controller Summary-- Clicking on this
button opens and configures the Controller Summary window.
See "Controller Objects" section below in this chapter
for more information.
Open and Configure Controller Summary-- Clicking on this
button opens and configures the Controller Summary window.
See "Controller Objects" section below in this chapter
for more information.
 Open and Configure Motion Supervisor Summary-- Clicking
on this button opens and configures the Motion Supervisor
Summary window. See "Motion Supervisor Objects"
section below in this chapter for more information.
Open and Configure Motion Supervisor Summary-- Clicking
on this button opens and configures the Motion Supervisor
Summary window. See "Motion Supervisor Objects"
section below in this chapter for more information.
 Open and Configure Axis Summary-- Clicking on this button
opens and configures the Axis Summary window. See "Axis
Objects" section below in this chapter for more information.
Open and Configure Axis Summary-- Clicking on this button
opens and configures the Axis Summary window. See "Axis
Objects" section below in this chapter for more information.
 Open and Configure Filter Summary-- Clicking on this button
opens and configures the Filter Summary window. See
"Filter Objects" section below in this chapter for
more information.
Open and Configure Filter Summary-- Clicking on this button
opens and configures the Filter Summary window. See
"Filter Objects" section below in this chapter for
more information.
 Open and Configure Motor Summary-- Clicking on this button
opens and configures the Motor Summary window. See
"Motor Objects" section below in this chapter for
more information.
Open and Configure Motor Summary-- Clicking on this button
opens and configures the Motor Summary window. See
"Motor Objects" section below in this chapter for
more information.
 Open and Configure SERCOS Ring Summary-- Clicking on this
button opens and configures the SERCOS Ring Summary
window. See "SERCOS Ring Objects" section below
in this chapter for more information.
Open and Configure SERCOS Ring Summary-- Clicking on this
button opens and configures the SERCOS Ring Summary
window. See "SERCOS Ring Objects" section below
in this chapter for more information.
 Open and Configure SERCOS Node Summary-- Clicking on
this button opens and configures the SERCOS Node Summary
window. See "SERCOS Node Objects" section below
in this chapter for more information.
Open and Configure SERCOS Node Summary-- Clicking on
this button opens and configures the SERCOS Node Summary
window. See "SERCOS Node Objects" section below
in this chapter for more information.
 Open and Configure SERCOS Idn Summary-- Clicking on
this button opens and configures the SERCOS Idn Summary
window. See "SERCOS Idn Objects" section below in
this chapter for more information.
Open and Configure SERCOS Idn Summary-- Clicking on
this button opens and configures the SERCOS Idn Summary
window. See "SERCOS Idn Objects" section below in
this chapter for more information.
 Configure Grid Rows-- Clicking on this button displays
a window to configure the Row Configuration of the highlighted
Object Summary window. This allows the configfuration of each
window to display only the required parameters. This will
simplify the Motion Console interface and hide parameters
that should not be modified. The Row Configuration settings
can be saved to an initialization file.
Configure Grid Rows-- Clicking on this button displays
a window to configure the Row Configuration of the highlighted
Object Summary window. This allows the configfuration of each
window to display only the required parameters. This will
simplify the Motion Console interface and hide parameters
that should not be modified. The Row Configuration settings
can be saved to an initialization file.
 Add Controller-- Clicking on this button adds a new
Controller object. See "Controller Objects" section
below in this chapter for more information.
Add Controller-- Clicking on this button adds a new
Controller object. See "Controller Objects" section
below in this chapter for more information.
 Refresh-- Clicking on this button will refresh the
Motion Console display. While the Status tabs at the bottom
of the Object Summary windows are constantly updated, the
Configuration tabs at the top are only updated when manually
changed by the user, when Motion Console is restored after
being minimized, or when the Refresh button is clicked. This
is particularly helpful if another application is also accessing
the XMP controller and changing the controller configuration.
Refresh-- Clicking on this button will refresh the
Motion Console display. While the Status tabs at the bottom
of the Object Summary windows are constantly updated, the
Configuration tabs at the top are only updated when manually
changed by the user, when Motion Console is restored after
being minimized, or when the Refresh button is clicked. This
is particularly helpful if another application is also accessing
the XMP controller and changing the controller configuration.
 Panic Button-- Clicking on this button activates a Panic
action for each Motion Supervisor.
Panic Button-- Clicking on this button activates a Panic
action for each Motion Supervisor.
 WARNING!
The Panic Stop behaves according to the
user-specified Panic Action parameter located in the Motion
Supervisor Summary / Config tab. Depending upon
how Panic Action is configured, a panic stop may initiate
a slow or rapid motion stop, an error state, or no error at
all. For details on configuring your Panic Stop, see
the "Motion Supervisor Object" section below in
this chapter. You must custom-configure
your Panic Stop according to the level of control and
safety required by your motion system!
WARNING!
The Panic Stop behaves according to the
user-specified Panic Action parameter located in the Motion
Supervisor Summary / Config tab. Depending upon
how Panic Action is configured, a panic stop may initiate
a slow or rapid motion stop, an error state, or no error at
all. For details on configuring your Panic Stop, see
the "Motion Supervisor Object" section below in
this chapter. You must custom-configure
your Panic Stop according to the level of control and
safety required by your motion system!
NOTE--
The Shift and Ctrl keys can be used to modify
the action performed when clicking on a toolbar button that
opens a window. The modified actions are listed below:
- Shift
+ button - Changes the state of the window. If the window
is closed, it will be opened. If the window is open, it
will be closed.
- Ctrl
+ button - If the window is already open, it activates
the window and brings it to the foreground. This is useful
for locating a window that is buried under other windows.
Furthermore,
for those buttons that open object Summaries, the Ctrl
and Shift keys will cause the Summary Object List Configuration
dialog box to be by-passed. The Summary window will be opened
to the current configuration.